Vanilla Extract ~ Triple Distilled
What do you think of when you hear the phrase Super Sized? McDonald’s? Yeah probably, but wouldn’t you rather be thinking about making a super sized bottle of Vanilla Flavoured Vodka?

It can be used as vanilla extract in the end…but all the way up to the time it is richly infused we suggest using it to cheer yourself up by making some vanilla vodka flavoured drinks for yourself and friends…like the Creamsicle.

RECIPE FOR THE CREAMSICLE:
- 2 parts vanilla liqueur (1 oz./30mL) ~ Galliano
- 2 parts vanilla vodka (1 oz./30mL) ~ what we’re making
- 8 parts fresh orange juice (4 oz./120mL)
- 4 parts half-and-half (2 oz./60mL)
- orange slice to garnish…or Canadian icicle
A few days ago, we made a marmalade that was inspired by the Creamsicle cocktail. It seems that every winter we get hooked on some kind of cocktail. A few years ago, it was the Creamsicle and last year it was the Friar Tuck. But, the Creamsicle Marmalade got us thinking. MMMMmmm, is vanilla flavoured vodka (like Smirnoff) really all that it CAN be or could we make it better. While, we are here to find out!
Simply start with an enormous bottle of vodka (or a small one) and do the following…
RECIPE FOR VANILLA FLAVOURED VODKA ~ VANILLA EXTRACT:
- 3 litre bottle of vodka (we don’t mess around here) or divide this recipe by 4 and use a 26 oz bottle
- 96 vanilla beans (or 24-26 per 26 oz bottle), split/divided Note: a good rule of thumb is to add as many vanilla beans as there are ounces in the bottle.
- 4 oz rum (you don’t need good rum but like whiskey rum comes in a wide range of qualities and flavours ~ In Canada 1919 is probably the best rum for the price…but in the US…you guys are so lucky ~ your choices are unlimited. Matt is a bit of a connoisseur and thoroughly enjoys Venezula’s Diplomatico Reserva Exclusiva (his all time favorite) or Ron Zacapa. These are both excellent drinking rums but will also really add to the finish taste of this vanilla vodka extra.)
- Order and purchase vanilla beans on ebay…so much cheaper but not so much better. These vanilla beans are so inexpensive on ebay but please be warned they are nothing like the vanilla beans that you will purchase at a specialty store like The Spice Trader in Toronto (they’re the best) or even as good as the ones at the Bulk Barn. The vanilla beans from The Spice Trader are really thick, plump, and juicy. The ebay ones are smaller and seem much more dried out, but they are perfect for this application. Save the more expensive beans for your curds, jams, and jellies.

Vanilla Bean on the top Organic Bourbon Vanilla Bean from the Spice Trader ~ Below an Ebay Purchase
- Slice the vanilla beans open lengthwise.

- Drop the vanilla beans into your bottle of vodka.

- Patiently wait for 3 to 4 weeks…we’re going to start making Creamsicles next week ~ And, see how the flavour matures.
- When you’ve had all the Creamsicles you can take, add some rum, and bottle it up. Be sure to keep a bottle or two for yourself and gift the others…your friends will love you!


We are going to use the 375mL wine bottles from our pal at our local brew your own; but any clean, sterilized bottle will do. Alcohol is a preservative and a great tasting beverage! It will keep forever!
Infused Vinegars ~ Rosemary and Orange Zest
Okay, so today’s the day to finish all those infused vinegars that have been sitting around in the office just doing their thing. We started four different kinds about a month ago which has given the herbs plenty of time to release their magical flavours and infuse the vinegar.

- From Left to Right ~ Dill and Mint, Lavender, Dill, and Rosemary

Making infused vinegars is pretty easy. It’s a great way to experiment with flavours and use some of those garden herbs. Surprisingly, I ended up liking the Lavender Vinegar the best. It has an almost sweet taste and such a beautiful fragrance without tasting like you are eating the plant. Hard to explain but if you grow lavender I would recommend making it this summer.
I also really liked the dill infused vinegar and a lot more than the dill and mint. I could really see myself using the dill infused vinegar on homemade french fries in place of malt vinegar.
As for the Rosemary and Orange Zest…the jury is still out. Let’s just say, it’s not one of my favorites. It kind of tastes like stuffing!?! Yeah, Thanksgiving Turkey Stuffing. Maybe the orange zest can work its’ magic and alter the flavour enough to make it good. Not really sure how to use this one and don’t think we’ll make it again. Of course…it’s the one we have the most of!?!
Here is the basic run down for making infused vinegars (this information was obtained from Mary Anne Dragan’s book Well Preserved):
- Rinse the herbs thoroughly but do not soak.
- Using a paper towel remove the moisture, leaving them to air dry for about an hour.

- Remove coarse stems, any damaged bits, and trim so that they fit in your jar.
- Place herbs in a clean, dry, sterilized jar that has a leak proof lid. A jar with shoulders is best because you want the herbs to be completely submerged in vinegar but we used mason jars and filled them right to the top. Remember jars with metal lids will corrode so you may want to avoid them or cover the jar with a piece of plastic wrap before sealing.
- A good rule of thumb is to use approximately 1 cup of loosely packed herbs to every 2 cups of vinegar…but this is just a guideline.
- Let the vinegar steep for 2 to 4 weeks. You can open them up after a week to see how the flavour is developing…it will intensify with time. But, after about 4 weeks the herbs will have given you all they’ve got.
- Strain the vinegar through a jelly bag or seive…make sure you dampen the jelly bag so that it doesn’t absorb your vinegar.

- Gently heat to a simmer in a nonreactive saucepan.
- Remove from heat, restrain, and let cool.

- Using a funnel pour liquid into a clean, dry, sterilized bottle. This is when to add your citrus zest, or fresh herb sprigs. Be sure to make sure the herbs are clean and dry. This makes the vinegars really attractive and will help with identification.

- Seal the bottles with plastic screw tops or corks. We reused the bottles the white wine vinegar came in…they were the perfect size and had great plastic caps. We bought the vinegar in bottles rather than plastic just so we could reuse them. We also sourced out some inexpensive 375 mL wine bottles from our local brew your own store. They sell the cork stops too.
- Label the bottles and store in a cool dark place. Herb vinegars will keep almost indefinitely but are at their best if used within 6 months to a year.
- Upon opening remove and discard the herbs as they will become moldy once exposed to air.


Put up Total:
Rosemary and Orange Zest in Red Wine Vinegar
- 2 x 375mL bottle
- 1 x 500mL reused bottle
Lavender in White Wine Vinegar
- 1 x 500mL reused bottle
- 1 x 125mL regular mouth mason jar
Dill, Lemon Zest and Fennel Seeds in White Wine Vinegar
- 1 x 500mL reused bottle
- 1 x 250mL regular mouth mason jar
- 1 x 125mL regular mouth mason jar
Dill, Mint and Lime Zest in White Wine Vinegar
- 1 x 500mL reused bottle
- 1 x 250mL regular mouth mason jar
Kimchi ~ Experimentation in Fermentation
Our friend, Turns (another Turnbull, no relation) has been asking us when we were going to make Kimchi. He knew that we loved having at least one, if not two, crocks of Sauerkraut fermenting on the kitchen counter…so why not try something different!? That’s right, why not? Well, we couldn’t come up with a good reason NOT to try this…so last night we ‘toasted’ Turns and started a batch.

Kimchi, is an extremely popular and culturally important fermented Korean dish. The variations of this traditionally spicy dish are endless depending on vegetable choices, amount of heat, use of fish sauce, and of course, personal taste. But, one thing is agreed…it is part of Korean culture and served with every meal (or, at least, this is what our research indicates). In March of 2010, South Korea opened a state-run Kimchi Research Centre which aims at developing fermentation technologies that will provide scientific data to help introduce the benefits of Kimchi to the global market.
There are a number of health benefits derived from eating fermented foods…many more than we ever realized or thought about. We just simply wanted to try making it and then, loved eating it. But, further reading and just simply getting hooked on the stuff has convinced us that it is more than the delicious homemade taste that keeps us refilling the crocks. The whole process of fermentation is amazing…the nutrients are not only preserved but they are also broken down making them easier for us to digest.
And, fermented Kimchi may have some of the most beneficial properties. It is made with a number of different vegetables, (usually cabbage, onions, and garlic) that are a rich source of vitamins; plus, a liberal amount of hot peppers, which are also known to have health benefits. Well, we are simply CANNERS and food lovers we are going to give fermentation two thumbs up! And, if this experiment turns out and we get hooked on Kimchi (like people claim they do after visiting Korea) we’ll give it four thumbs up!

RECIPE FOR A BASIC KIMCHI: from Wild Fermentation by Sandor Ellix Katz (this is for a 1 litre or 1 quart jar) but we multiplied ours by 6 because our two napa cabbages weighed 6 pounds…it seems nothing is done in small batches around here.
- Sea Salt or Pickling Salt
- 1 pound Chinese cabbage (napa or bok choi)
- 1 daikon radish or a few red radishes
- 1 to 2 carrots
- 1 to 2 onions and/or leeks and/or a few scallions and/or shallots (or more!)
- 3 to 4 cloves of garlic (or more!)
- 3 to 4 hot red chilies (or more!), depending on how hot-peppery you like food, or any form of hot pepper, fresh, dried, or in a sauce (without chemical preservatives!)
- 3 tablespoons (or more!) fresh grated gingeroot
- Mix a brine of about 4 cups (1 litre) of water and 4 tablespoons of salt. Stir well to thoroughly dissolve salt. The brine should taste good and salty. It is important to point out that you should not use water that is heavily chlorinated because it kills the microorganisms. Water that is chlorinated should be boiled before use to evaporate the chlorine…but, we’d recommend using water from another source.
- Coarsely chop the cabbage, slice the radish and carrots, and let the vegetables soak in the brine, covered by a plate or other weight to keep the vegetables submerged, until soft, a few hours or overnight. Add other ingredients to the brine, such as snow peas, seaweeds, Jerusalem artichokes, anything you like. Here we cut the radishes and carrots into rounds but next time we’d slice them into thin strips…it won’t affect the taste but next time, it will look more authentic.

- We let our veggies soak in the brine overnight…it was too late to finish what we started. See how full the pot is now…check out the difference once the veggies have soaked, been mixed with the paste and repacked…it’s the same crock.
 Next Day~ Prepare spices: Grate the ginger; chop the garlic and onion; remove seeds from the chilies and chop or crush, or throw them in whole. Kimchi can absorb a lot of spice. Not really sure what “a lot” of spice means…Matt loves things crazy hot but I don’t. So, we deseeded the chilies and left them whole.
  Experiment with quantities and don’t worry too much about them. Mix spices into a paste. The magic bullet works great for this job! (If you wish, you can add fish sauce to the spice paste. Just check the label to be sure it has no chemical preservatives, which function to inhibit microorganisms) We didn’t have any fish sauce ~ so we will have to add it to the next batch…see, we’re already preparing for the addiction that is going to strike!
- Drain brine off vegetables, reserving brine (you won’t need too much, if any) Taste vegetables for saltiness. You want them to taste decidedly salty, but not unpleasantly so. If they are too salty, rinse them. If you cannot taste salt, sprinkle with a couple of teaspoons salt, and mix.
- Mix the vegetables with the ginger-chili-onion-garlic paste. Mix together thoroughly and stuff it into a clean 1 litre jar. We packed our Kimchi back into a small 2 gallon crock.
 Pack it tightly into the jar, pressing down until brine rises. If necessary, add a little of the reserved vegetable-soaking brine to submerge the vegetables. In ours, the brine instantly began to rise and we did not require any additional liquid…but we did reserve some in a 1 litre jar just in case. Weight the vegetables down with a smaller jar and cover the jar to keep out dust and flies.
- Ferment in your kitchen or other warm place. Taste the kimchi every day. After about a week of fermentation, when it tastes ripe, move it to the refrigerator. An alternative and more traditional method is to ferment kimchi more slowly and with more salt in a cool spot, such as a hole in the ground, or a cellar or other cool place. Further reading suggestions that Kimchi gets better tasting with age (6 months and up) and may last 1 to 2 years. We don’t think this small little bit has any chance of lasting a couple of months…but the whole thing is so interesting.


The Kimchi smells so good…hopefully, it will mask the smell of the Sauerkraut (although, the Kraut smell is not too strong…every once it a while, you get a whiff of a smelly cheesy, dirty sock odor…MMMmmm but it tastes so good) Let’s hope the Kimchi isn’t too hot and tastes as good as the Kraut. Fingers crossed!
Gateau Basque – Eat’n Up Turnbull Style!
From time to time, we like to share with you, all the different ways canned preserves can be used to make some of the most delicious things. It can be as simple as tomato sauce on a home-baked pizza or sauerkraut on a reuben sandwich but this next recipe tops those…because it’s a dessert made Turnbull Style. Dessert is one of the most yummy parts of a meal and in this next recipe we will show you how combining a variety of homemade preserves makes something great…AMAZING. So, let’s Eat Up!
This recipe was adapted from the book, The Food of France, published in Canada by Whitecap Books. This tart style cake from the Basque country traditionally uses an almond flavoured crust with a cherry spiked custard filling. Sounds like a pretty delicious recipe to be messing around with right? But, why not put your own twist on it by adding some home canned goodies; after all, recipes are only guidelines for experimentation. So, here’s a stripped down version of the recipe.
Almond Pastry
- 3 1/4 cups: all-purpose flour
- 1 tsp: finely grated lemon zest
- 1/2 cup: ground almonds
- 2/3 cup: granulated sugar
- 1 egg
- 1 egg yolk
- 1/4 tsp: vanilla extract
- 5 1/2 oz(about 2/3 cup): butter softened
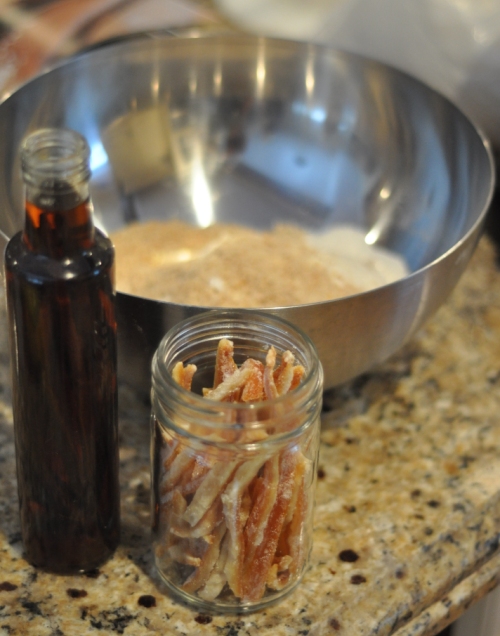
Combine the flour, lemon zest (I substituted 1 tbsp of our candied orange peel ground) and almonds (feel free to use your favorite nuts like hazelnuts, pecans, or walnuts). Next combine the sugar, eggs, vanilla extract (again, I used some of our homemade vanilla extract ~ it’s so easy to make and fun…we’ll be posting this soon), and butter.

Blend the egg mixture into the dry ingredients. Use your hands to form the dough into a ball then divide 2/3 of the dough. The recipe states chilling the dough at this point but I rolled it out immediately between two sheets of waxed paper.

I then placed the rolled out dough into a 10″ springform pan, you could also use a glass tart or pie plate, or a metal tart ring placed on a baking sheet as in the recipe. Whichever container you choose trim any excess dough.

The recipe suggests chilling at this stage for 30 minutes but I don’t think it’s necessary. Next we’ll make the filling, oh, did I say filling I mean…
Almond Creme Patissiere:
- 6 egg yolks
- 3/4 cup: granulated sugar
- 1/2 cup: all-purpose flour
- 1/2 cup ground almonds (or other nuts)
- 4 cups: milk
- 4 vanilla beans ( Two beans will add more than enough vanilla flavour)
- 4 tbsp: cherry jam or jelly (improvise with any jam or jelly, I used our Netherworld Cascadian Spiced Beer Jelly from a very cool local micro-brewery)
- 1 egg lightly beaten
Whisk together the egg yolks and sugar until creamy. Stir in the flour and ground nuts. Split the vanilla beans with knife and scrape out the seeds then place the bean casings and seeds in a large saucepan with the milk. Heat to a boil stirring constantly. Remove the bean casings then pour a small amount of milk over the egg mixture stirring to combine and being careful not to curdle the eggs. Once half of the milk is combined add the remainder. Return to the saucepan and bring to a boil over medium heat then simmer until thickened (about two minutes) stirring continuously. Allow to cool to a thick custard consistency, this doesn’t take long in our neck of the woods, I just threw it out on the porch for about 10 mins…arctic cold Canada eh!?
Next spread your preserved jam or jelly over the bottom crust, then smooth the custard over that.

Roll out the remaining 1/3 of dough for the top crust. Brush the bottom crust with the beaten egg and attach the top crust. Trim and flute the rim, then brush the top with the remaining beaten egg. Score the top to allow venting. Bake in oven preheated to 350 F for 40 mins or until golden brown. Allow to cool for an hour before slicing.

I hope this recipe has inspired you to improvise when baking and cooking. Finding innovative ways to use your own preserved items will bring new excitement to more traditional meals and help you maintain superhero status among friends and family.
Eat Up Total:
- 1 Big Ass Tart…enjoyed between friends (and, there was some left over)
Vodka Soaked Oranges? Why not make Creamsicle Marmalade
This marmalade was created out of the need to NOT waste any of the boozy navel oranges that remained after creating some Orange Liqueur. So, it will be a two-part post. First, the making of Orange Liqueur and then we will get to the Creamsicle Marmalade.
We were inspired to create the Orange Liqueur after reading Pam’s post on Sidewalk Shoes. Pam is always creating something cool in the kitchen and this one really resonated with us…how could it not? Afterall, vodka was involved. It’s pretty easy to make with the most difficult part being the patience that’s involved while you wait for the flavours to marinate.

RECIPE FOR ORANGE FLAVORED VODKA:
- 26 oz bottle of vodka…the cheap stuff will do.
- 6 sweet oranges, like navels
- Pour the vodka into a clean mason 1.5mL mason jar (or any large jar) with a tight-fitting lid. Wash the oranges and slice them into 1/4″ rounds and submerge them in the vodka. Store in a cool, dark place for 2 weeks, shaking it once a day.
- Strain the liquid through a damp jelly bag or cheesecloth lined sieve (remember to dampen it so that it does not steal any of your precious orange vodka). Return the vodka to a jar, and put it back in its cool, dark place to age for 3 weeks to mature the flavour…Note: we skipped this part. We didn’t really understand why it needed to mature or how the flavour would change since the orange slices were removed…do as you will…maybe you can be more patient.
- Make a simple syrup by combining the ingredients below in a saucepan. Heat on medium-high heat and stir until the sugar dissolves. Allow to cool completely.
- 1 cup sugar
- 1 cup water
- 4 cups orange flavour vodka
- Strain the vodka again through the sieve into a large mixing bowl and add the simple syrup. Add a bit of the syrup at a time if you don’t want it too sweet…remembering that it will get sweeter as it ages. We added it all.
- Using a funnel pour into clean sterilized jars, cover tightly, label and store in a cool dark place for 6 weeks. Here again, we’re not sure why you need to store it for an additional 6 weeks…it tastes good…maybe, it gets better. We also believe the shelf life is indefinite as there is so much alcohol.
Put up Total:
- 2 x 375mL bottles
- 1 x 500mL bottle
Now, onto the Creamsicle Marmalade. We just couldn’t throw away those vodka soaked orange slices…what to do!?! Make vodka marmalade! This marmalade is inspired by one of my favorite little drinks…the creamsicle. The creamsicle uses just a few basic ingredients (vodka, vanilla vodka, orange juice and cream) and they kinda take you back to those fond childhood memories of eating frozen creamsicles…you know the ones?…less the alcohol. Anyway, this marmalade is based on that drink and here is how we recreated it in a marmalade.

CREAMSICLE MARMALADE:
- 2 pounds sweet oranges, thinly sliced and cut into eighths (we used navels) ~ 1 1/2 pounds came from the orange flavoured vodka and the additional 1/2 pound we added.
- 1 3/4 cups organic cane sugar
- juice of 1 orange (freshly squeezed with seeds removed)
- 1 organic bourbon vanilla bean
- Prepare canner, jars, and lids.
- In a mixing bowl combine orange eighths, sugar and orange juice. Mix together.
 Transfer the mixture to an 11- or 12 quart copper preserving pan or a non-reactive saucepan.
 - Bring the mixture to a boil over medium-high heat. Add sliced open vanilla bean and seeds to the pot.

- Continue to boil for approximately 15 minutes. At this point, you may want to start to test for doneness. Remove from heat and using a frozen teaspoon transfer a small bit onto a frozen plate. Allow to sit for 30 seconds. Run your finger through the small dallop and if it remains separate it is finished.
 If not, return to the stove and continue to cook, being careful to check it again in a minute or so.
 - When the marmalade is finished skim the foam (if any), remove and discard the vanilla pod, and pour into hot sterilized jars, leaving 1/4″ headspace, wipe rim, add lids and rings and process in a hot water bath for 10 minutes.


This marmalade has a great flavour but we did over cook it slightly. The best thing to do is to start testing it for doneness once the foaming bubbles subside…for this marmalade it was about 15 minutes into the cooking time. Below is a pictorial of how this marmalade looked from the start of cooking until just about finished.

Initially, the marmalade will bubble gently but as more of the moisture cooks out of it and the sugar concentrates, it will begin foaming. As seen below.

Once the foaming bubbles occur be sure to stir it occasionally with a wooden spoon or heatproof rubber spatula. When the marmalade colour darkens slightly and the bubbles decrease in size it is a good indication that most of the moisture has evaporated and that it is reaching the set point.

At this point, you should be testing for doneness. We left ours bit longer…a minute or so can make a big difference and there is no going back. So, it is better to be cautious and start testing early.

Put up Total:
-
3 x 250mL regular mouth mason jars
-
1 x 250mL wide mouth mason jars
Butternut & Vanilla Jam
Happy New Year! A new year…a new look for Putting Up With the Turnbulls. We are still playing around with things here and imagine that they will change again from time to time…but don’t be fooled…we are still the same two crazy canning Canuks from Northern Ontario.

This autumn, our friend provided us with a glut of butternut squash from her garden and with several small butternuts still hanging around in our cold storage room we decided to adopt this recipe to suit our glut.
This recipe comes from Gloria Nicol’s book Fruits of the Earth. For those of you who read this blog on a regular basis you know we think the world of Gloria. She is a wonderfully inventive home preserver who creates the most beautiful combinations of flavours in a jar. She also has a great blog that you should check out…Laundry Etc
BUTTERNUT & VANILLA JAM
- 2 pounds butternut squash flesh
- 1 vanilla bean
- 4 3/4 cups sugar
- juice of 2 lemons
- Place the butternut squash in a pan with just enough water to stop it from catching, and cook over a moderate heat for 10-15 minutes until it is cooked through but still retains its shape. Drain off any excess juices, and when the pumpkin is cool enough to handle, chop it into finer pieces.
- Slice the vanilla bean in half lengthwise and scrape out the seeds with the blade of a knife. Place the pumpkin, sugar, and lemon juice in a bowl, tuck the vanilla bean pieces in among the pumpkin, and add the seeds. Cover with a piece of waxed paper pushed down onto the surface and leave overnight.

- The next day, pour the contents of the bowl into a preserving pan and stir over a low heat until all the sugar has dissolved, then turn up the heat and boil rapidly to reach setting point.

- Pour hot jam into hot sterilized jars leaving 1/4″ headspace, wipe rim, place lid and rings on adjusting to finger-tip tight. Process in the hot water bath for 10 minutes.


You may not think that a butternut squash would make a beautiful tasting jam…but this is where you’d be wrong. These home grown butternuts were a deep orange colour with a natural sweetness that peaked the interest of our senses. Their fleshy earthy goodness pairs wonderfully with vanilla to make a tasty spread for some home-baked scones or what about using it as pie filler (instead of pumpkin pie…why not butternut?). So, when you are faced with a glut of butternuts…we highly recommend taking the path not always preserved and try making them into some jam.

Put up Total:
- 1 x 125mL regular mouth mason jar
- 1 x 250mL wide mouth mason jar
- 3 x 250mL regular mouth mason jars


