Haw~Apple Butter
Matt was fortunate to get a nice bunch of hawberries freshly foraged by his good friend and fellow canner Ben. These berries come from Manotulin Island further north of us by about 4 hours. What a score!
Once stemmed and washed we had about 4 cups of hawberries to work with and here is what we did with them.
OUR RECIPE FOR HAW~APPLE BUTTER:
- 4 cups hawberries
- 3 tart apples (Granny Smiths work well)
- 1 cup water
- Place hawberries and apples in a sauce pan and simmer until soft
- Put through a food mill discarding skins and seeds
- Placing back in a sauce pan add an equal amount of sugar to hawberry/apple pulp
- Boil until setting point
- Pour into hot sterilized jars leaving a 1/4″ headspace; add sterilized snaps and lids to finger tip tight
- Process in hot water bath for 10 minutes
- Remove lid from hot water bath and let stand for 5 minutes before removing
Put up Total:
- 1 x 250mL wide mason jar
- 1 x 125mL regular mason jar
Spiced Blackberry Jam
During the 5 hours I spent stemming the elderberries tonight Matt was able to finish the rest of the rose hip jelly (1 more batch) and turn our 4 cups of blackberries into some spiced jam.
RECIPE FOR SPICED BLACKBERRY JAM:
- 8 cups of blackberries
- 1 star anise
- 3 cloves
- 1 small cinnamon stick
- juice of 2 lemons
- 3 cups warmed white sugar
- Create a spice ball with the star anise, cloves and cinnamon
- Place the blackberries and the spice ball in a sauce pan with 2 tablespoons of water or just enough to prevent fruit from sticking to the bottom
- Cook until tender and juicy ~ mashing the fruit with the back of a spoon
- Remove spice ball and press the berries through a food mill
- Add lemon juice to the blackberries and place them in a preserving pan; heat through, stirring often.
- Add warmed sugar stirring until dissolved
- Turn up the heat and boil rapidly until the jam has reached the setting point
- Pour hot jam into sterilized jars leaving 1/4″ headspace and add sterilized snaps and rings
- Process in a hot water bath for 10 minutes.
- Remove lid and let stand in hot water bath for 5 minutes before removing
Put Up Total:
- 2 x 250 wide mouth jars
Foraging
Today Matt and I spent from 8am in the morning until 6pm in the evening driving the back roads of Muskoka picking the abundance of ripe fruit we found a long the way. I think that wherever you live there is probably a wealth of food right at your finger tips; we just need to know what to look for and what to do with it when we find it. Fortunately for me Matt grew up interested in his surrounding environment and spent time getting to know which plants, leaving, roots etc…are eatable and which are not. And, whenever in doubt do some research…there is no need to put yourself at risk by eating something toxic.
Foraging is so fun! Searching for food, picking it and making it into something tasty is so rewarding. We went out to look for blackberries that are normally ready at this time. But after finding our regular patch dried up too much sun and the lack of rain we figured we’d have better luck elsewhere. So, we just drove around some of Muskoka’s beautiful back roads and we came across lots and lots of elderberries and several crab apple trees just ladled with food…but we only found and picked 4 cups of blackberries.
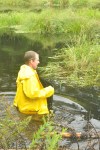
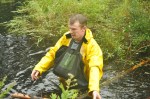
The best elderberry tree that we found was on a tiny island in the middle of a pond but it was so heavily ladled with fruit that Matt refused to pass it by. First, he attempted to build a bridge out of thin trees and when they snapped and he fell into the pond up to his waist he decided to just go for it. The funny part is that it was already a wet and rainy day and we both thought that we were soaked but it wasn’t until after failing into the pond that he realized he hadn’t been that wet. As you’ll see in the photos he’s wearing his rain jacket…some good that did.
Here are some of the shots I took. It was so funny. Only two crazy people would do this for some berries…I guess that’s us!


Peaches in Syrup
Peaches might just be the easiest thing to put up. On Wednesday I purchased one flat of peaches that consisted of 6 x 3 litre baskets. They looked beautiful, freshly picked in the Niagra region by TR Jones Farm.
We use an extra light syrup for our peaches because we think the actual fruit is sweet enough.
RECIPE FOR EXTRA LIGHT SYRUP:
- 1 cup white sugar to 4 cups water
- bring to a boil stirring to dissolve sugar
- simmer to keep warm until adding it to the packed jars of peaches
- 4 batches will do 1 flat of peaches (a flat consisting of 6 x 3 litre baskets)
- Rum ~ 1 tbsp per 1 litre jar to be added at the end when you are jarring (optional)
Let’s get started…
- Make your extra light syrup.
- If you are doing a large quantity of peaches (1 flat or more) prepare two large bowls of lemon juice and water that you will place peaches in to prevent browning. MIX: 1/4 cup of lemon concentrate to every 4 cups of water.
- Blanch your peaches in a pot full of boiling water for 30 seconds. The peaches that you put into your boiling water should be ripe but firm. DO NOT use bruised fruit or seconds as this will make the removal of the skin very difficult!

- Place the peaches on a cookie sheet. We found that it is better to put them on a cookie sheet than in a bowl because they continue to cook in a bowl as you pile one on top of the other.

- Remove the skins (they should just melt away from the fruit). Cut in half and remove the pit from all peaches except 1. You will want to place one peach with pit intact at the bottom of each jar. This is what my mother always did and she swears that the years she did not do this the peaches were not as sweet or as firm.
- Place the skinned cut peaches the bowl of lemon juice and water to cover. This will prevent them from browning.

- Placing the peach with its’ pit ~ pit side down pack each jar until full leaving 1/2″ headspace. Remember peaches will float up so pack the jars as tightly as you can without damaging or bruising fruit.
- Add hot syrup and 1 tbsp of rum per 1 litre jar to 1/2″ headspace. Note: Rum is optional and can be added to all of the jars or just a few.

- Remove all air bubbles and top up liquid to 1/2″ headspace. Note: peaches are one of the fruits that contain a lot of extra air so removing as many bubbles as you can is important. The air contained in the peaches will cause some siphoning and although we raw pack ~ hot packing may be your preferred choice. We use the raw pack method because we do not want our peaches to be too soft.
- Wipe rims and place your sterilized snaps and rings on each jar.
- Process in a hot water bath. Bring to a full rolling boil and process for 10 minutes.
- After 10 minutes remove lid and turn off heat leaving the jars in the hot water bath to cool for 5 minutes before removing. This important step will help to reduce the amount of siphoning because it allows the liquid to cool down more gradually.

- Wait for the pop…they’ve SEALED. Label and celebrate another success story!


We did have a little help from our apprentice….
Put up Total:
- 54 x 1 L wide mouth jars
- 1 x 500mL wide mouth jar
MmmmmMmmmmGOOD!!!

Golden Beet Relish
 Oh so many veggies…oh so many recipes to try. At the farmers’ market I am always looking for something different and something that will taste great and add usual colour to the jar. I found Golden Beets and thought this might be interesting to preserve. They are a beautiful orangey red colour and sweeter than the regular purple beet we are used to.
Using 25 golden beets we were able to make this sweet and savory relish that not only looks great but tastes better. We slightly modified a recipe we found in the Put ’em Up book. And, for those of you who like hot and sweet I think it could be even better if you added a slice or two of jalapeno peppers.
This relish will fair well with pork or compliment any cheese plater!

Put up Total:
- 4 x 500mL wide mouth jars
- 1 x 500mL fancy wide mouth jar
Rose Hip Jelly
I was driving home from the farmers’ market in Gravenhurst yesterday with my eyes peeled for more milkweed pods and instead I found a bountiful supply of rose hips. Perfect…I’ll make rose hip jelly instead. Again, this little gem uses a fruit that you can forge yourself and that always brings out my gathering instincts. In minutes I was easily able to pick a 2 litre basket of rose hips. Now, watch out for those thorns!
The juice from this wild berry is rich in vitamin C and will be a delicious treat on fresh-baked scones or with a little creamy cheese. Because this tiny fruit is so full of seeds it is impossible to eat raw so jelly making is the perfect alternative.

RECIPE FOR ROSE HIP JELLY
- 4 cups rose hips; stemmed and rinsed
- 2 pounds cooking or tart apples; Granny Smiths or even crab apples would work well
- 3/4 cup white cane sugar for every 1 cup of juice collected
- red food colouring; optional
- Rinse and stem rose hips in cool water. Wash and roughly chop the apples removing the stem and blossom end but leaving the peel, seeds, and core. Note: General rule of thumb for making this jelly is to use 2 pounds of tart apples with every 4 cups of rose hips (stemmed and rinsed).

- Place rose hips and apples in a stainless steel preserving pan and add enough water to cover them. Simmer gently for around 45 minutes OR until the fruit is soft and broken apart.
 REMEMBER if you are doing more than 4 cups at a time it will take longer to cook the mixture to a pulpy consistency.
- Using a food mill separate the skins, seeds, and cores from the pulp and juice OR press the fruit with the back of a spoon through a mesh sieve over a bowl to collect the juice.

- Pour both the collected juice and the mashed fruit into a jelly bag and let it drip undisturbed over night (Note: we put our jelly bag over a 1.9 Litre mason jar but the jelly bag from Lee Valley is much easier to work with).

- The next day, discard the pulp mixture from the jelly bag.
- Pour the collected juice through the jelly bag for a second time to remove any remaining pulp. This will help to ensure your jelly is clear.
- Allow 3/4 cup warmed white sugar for every 1 cup of juice.
- Place the juice and warmed sugar in a stainless steel preserving pan and stir over low heat until all of the sugar has dissolved. Add red food colouring (optional) if you want to intensify the colour of the jelly ~ some rose hips are more orange in colour than others and a drop or two of red food colouring will change the end result.
- Then turn up the heat and boil rapidly to reach the setting point.
- Jell test: using a plate that has been cooled in the freezer place a small spoonful of hot jelly onto the plate. Try to separate with the tip of your finger and if the liquid stays separated you know it is ready. Remove from heat and skim any foam.
- Pour hot jelly into hot sterilized jars leaving a 1/4″ head space, remove any air bubbles, if necessary top up with jelly, wipe rims, and add sterilized lids and rings to finger tip tight.
- Process for 10 minutes in a boiling hot water bath. When time is up turn off the heat and remove the lid. Let jars stand in hot water bath for 5 minutes before removing.
- Check seals, label, and store.


This jelly turned out wonderful. It has a rich earthy essence with a light familiar sweetness. A dollop placed on fresh-baked scones is bound to impress.
Put up Total Today:
- 3 x 375mL
- 4 x 250mL
- 1 x 125mL
Put up Total August 22nd:
- 4 x 250mL regular mason jars
- 1 x 250mL wide mouth jars
- 1 x 125mL regular mason jar


